When Disney Pink Adventures and I were thinking of ideas to make for our Hangry Disney Halloween collab, she really wanted to make these Halloween Mickey Piñata cookies. We got the inspiration from a lady on Instagram called The Icing Artist. So basically these cookies are 3 sugar cookies combined into one, decorated and held together using royal icing and a surprise ingredient inside... SPRINKLES.
Now going into making these cookies I was skeptical. It would be one of the first times I was messing with Royal Icing, as well as a recipe I had never tried out before. But Disney Pink Adventures INSISTED we make these, it was her only request. So I obliged and let me tell you....it was an experiment for sure!
It was fun, but in the end, we only ended up with enough dough and icing so we could each have 1 piñata cookie each. They were actually good cookies, but they were a pain to make. I don't know how the Icing Artist made it look so easy. Here are a few notes about this recipe that would make me not want to make it again:
- They are super time-consuming. The dough takes very minimal time to make but the decorating/drying part is the hardest and takes the longest.
- 3 cookies in 1 are a lot of cookies. They are thick and then you have the icing and sprinkles on top of that.
- Royal Icing takes some time to master. This was my first time and it was very tricky.
If you decide to experiment and make these Halloween Mickey Piñata Cookies, please let us know how they worked for you! Leave a comment or tag us on Instagram @thathangrygurl or @disneypinkadventures.
Halloween Mickey Piñata Cookies
Ingredients
Sugar Cookies
- 1 cup butter
- 1 cup sugar
- 1 teaspoon vanilla extract
- 1 egg
- 2¾ cup flour
- 1 teaspoon baking powder
- 1 lb bag of Royal Icing mix
- 1 cup water
- 1 container sprinkles
- 1 Mickey Mouse cookie cutter
- Orange and Yellow food coloring
Instructions
Preparing sugar cookies
- Beat butter, sugar, and vanilla on high for 2 minutes.
- Add egg and beat again for 2 minutes.
- In a separate bowl, combine flour and baking powder.
- Add dry ingredients to wet mixture gradually. Make sure to mix in between each addition.
Cutting the Mickey-shaped layers
- Take the dough and place on a lightly floured surface and roll out to ¼ in. thick.
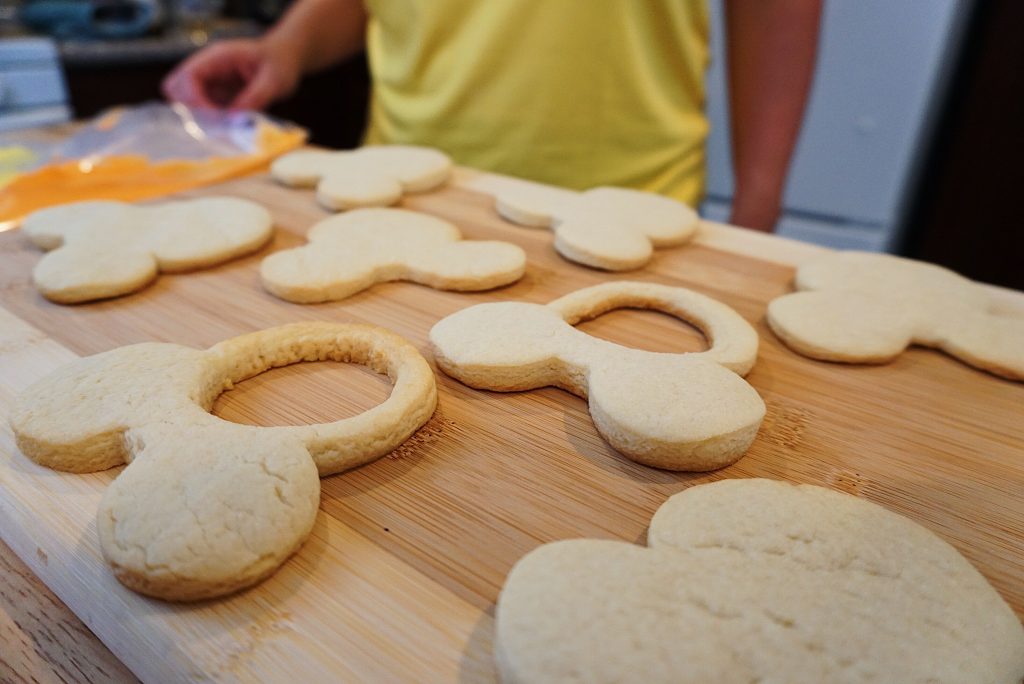
- Cut out 12 Mickey Mouse shaped cookies.
- Place 8 cookies on a baking sheet lined with parchment paper.
- For the remaining 4 cookies, cut a hole around where Mickey's face would be. (see picture)
- Bake at 375° for 8-10 minutes until the cookies have golden brown edges.
- Cool completely before icing/assembling.
Royal Icing
- Mix 1 lb bag of icing mix with 1 tablespoon water and mix together. Add more water 1 tablespoon at a time until you reach the desired consistency.
- I separated the icing into 3 bowls and dyed 1 bowl orange, 1 bowl yellow, and 1 bowl I left white.
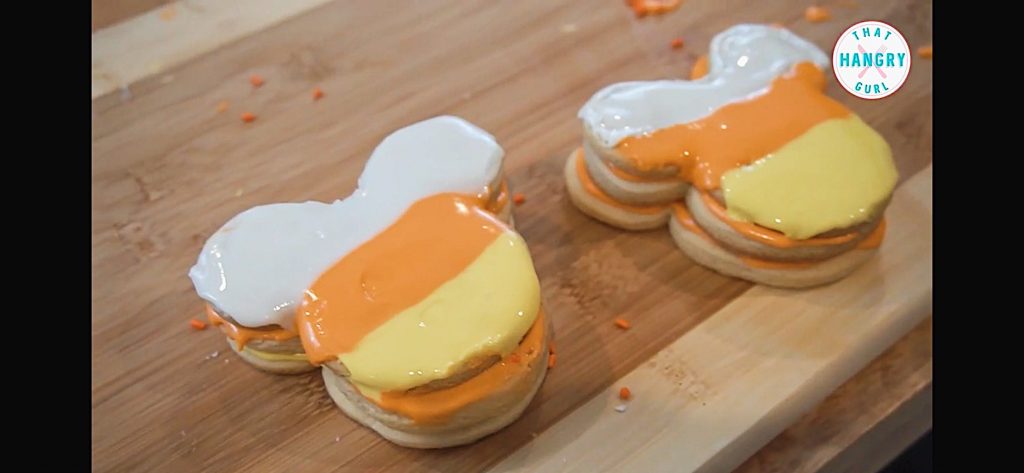
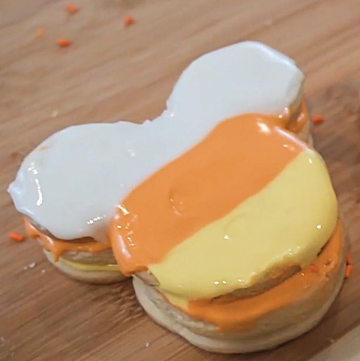
- Then I put the icing into icing bags and decorated the 3 cookies as candy corn. Those will be the tops of the cookie.
- Let the cookie cool completely before assembling the rest of the cookie.
Assembling the Cookies
- Place 1 Mickey-shaped cookie as the base. Line the outside with Royal Icing (color doesn't matter)
- Place the Mickey-shaped cookie with the hole in it on top of the base cookie.
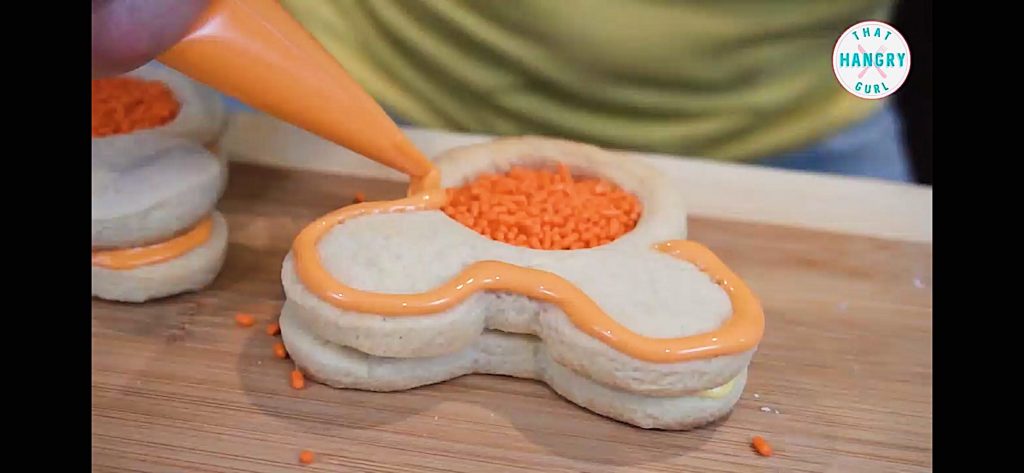
- Line the outside of the hole cookie with royal icing. Fill the hole with sprinkles.
- Place the decorated cookie on top.
- Let the icing dry and enjoy!
Notes
- I used store bought Royal Icing mix. It was a 1lb bag and you just mix it with teaspoons of water gradually to get the consistency you want.
- You can make your own Royal Icing if you wish to, but you will have to look up a recipe for that on Google.
Leave a Reply